Intro
이전 글에 이어 CI/CD를 구성해 봅시다.
사용할 기술 스택은 다음과 같습니다.
- Github Action
- kustomize
- ArgoCD

ArgoCD
ArgoCD란 쿠버네티스 애플리케이션의 배포를 Git 저장소의 상태에 기반하여 자동으로 동기화하고 관리해 주는 도구입니다.
ArgoCD 설치
여러 설치 방법 중에 manifest를 이용해 설치합니다. 해당 문서를 참고하여 설치 버전을 선택해야 하는데, 저는 쿠버네티스 v1.32에 맞는 v2.14.9를 설치할 예정입니다.(https://raw.githubusercontent.com/argoproj/argo-cd/v2.14.9/manifests/install.yaml) 파일을 다운로드하고 필요한 리소스를 추가 또는 수정합니다.
보통 권한, 배포 알림 등을 수정하는데, 여기서는 간단히 github SSO를 설정하겠습니다. github token의 권한 및 생성 과정은 참고할 자료가 많아 생략합니다.
- argocd-cm
apiVersion: v1
kind: ConfigMap
metadata:
  labels:
    app.kubernetes.io/name: argocd-cm
    app.kubernetes.io/part-of: argocd
  name: argocd-cm
  namespace: argocd
data:
  admin.enabled: "false"
  dex.config: |
    connectors:
      - type: github
        id: github
        name: GitHub
        config:
          clientID: ${GITHUB_CLIENT_ID}
          clientSecret: ${GITHUB_CLIENT_SECRET}
          loadAllGroups: true
- argocd-rbac-cm
apiVersion: v1
kind: ConfigMap
metadata:
  labels:
    app.kubernetes.io/name: argocd-rbac-cm
    app.kubernetes.io/part-of: argocd
  name: argocd-rbac-cm
data:
  policy.csv: |
    g, ${GITHUB_ORGANIZATION}, role:admin
이제 해당 manifest와 ingress(생략)를 적용하고 접속하면 아래와 같이 깃헙 로그인 버튼만 활성화됩니다.

manifest 설치 시 생성되는 주요 pods
- argocd-server: API 서버 및 웹 UI 제공
- argocd-repo-server: git 저장소에서 애플리케이션 정의를 가져와서 최종 yaml로 변환
- argocd-application-controller: 정의된 상태(git)와 실제 상태(k8s)를 비교하고 동기화
- argocd-dex-server: 로그인 인증을 위한 OIDC provider
- argocd-redis: ArgoCD 내부 캐시 저장소
- argocd-notification-controller: slack, discord, email 등으로 배포 알림 전송
k8s cluster 추가
쿠버네티스 클러스터를 추가하기 위해선 argocd cli를 설치해야 합니다. 공식 문서를 참고하여 argocd cli를 로컬에 설치합니다.
argocd login {your domain} --sso
argocd cluster add {your context}

# kube-system namespace에 리소스 생성이 불가한 경우 별도의 namespace 생성
kubectl create namespace {another namespace}
argocd cluster add {your context} --system-namespace {another namespace}
이제 argoCD UI에서 Settings-Clusters 로 가보면 해당 컨텍스트가 추가된 것을 볼 수 있습니다.
Repositories, Projects 추가
argoCD UI의 Settings-Repositories에서 gitops 레포지토리를 등록합니다. SSH, HTTPS, GITHUB APP 등을 통해 등록할 수 있습니다.
Settings-Projects에서는 위에서 연결한 레포지토리와 클러스터를 연결한 프로젝트를 생성합니다.
rollouts 설치
ArgoCD rollouts는 점진적 배포를 k8s 환경에서 안전하고 자동으로 수행할 수 있게 도와주는 CRDs입니다. Canary, Blue-Green 배포를 지원합니다. 자세한 설명은 Argo Rollouts를 참고해 주세요.
kubectl create namespace argo-rollouts
kubectl apply -n argo-rollouts -f https://github.com/argoproj/argo-rollouts/releases/download/v1.8.2/install.yaml
이렇게 ArgoCD 설치 및 설정은 완료하였습니다🥳
애플리케이션 배포는 CI/CD 파이프라인 구성 후에 해보겠습니다.
Github Actions
최상단 이미지와 같이 Github actions + ArgoCD를 통해 CI/CD 파이프라인을 구축하고 spring applciation을 blue-green 방식으로 배포해 보겠습니다.
서비스 애플리케이션
Dockerfile이 아닌 jib로 OCI 이미지를 생성할 것이므로 build.gradle.kts 에 아래와 같이 정의합니다.
plugins {
    id("com.google.cloud.tools.jib") version "3.4.5"
}

dependencies {
    implementation("org.springframework.boot:spring-boot-starter-web")
    implementation("org.springframework.boot:spring-boot-starter-actuator") // health check
}

jib {
    val username = project.findProperty("username").toString()
    val password = project.findProperty("password").toString()
    val image = project.findProperty("image").toString()
    val tag = project.findProperty("tag").toString()

    from {
        this.image = "eclipse-temurin:21-jre-jammy"
        platforms {
            platform {
                architecture = "arm64"
                os = "linux"
            }
        }
    }

    to {
        this.image = image
        this.tags = setOf(tag)
        auth {
            this.username = username
            this.password = password
        }
    }

    container {
        format = com.google.cloud.tools.jib.api.buildplan.ImageFormat.OCI
        ports = listOf("8080")
        workingDirectory = "/app"
    }
}
.github/workflows 하위 디렉토리에 워크플로우 yaml 파일을 생성합니다.
name: CI/CD dev

on:
  push:
    branches: ["develop"]

env:
  PHASE: dev
  REGISTRY_TAG: dev-${{ github.run_number }}-${{ github.run_attempt }}
  REGISTRY_IMAGE: ghcr.io/${{ github.repository }} # github registry

jobs:
  build-api:
    runs-on: ubuntu-latest
    env:
      SERVICE_NAME: ${{ github.event.repository.name }} # demo-spring-cicd
    steps:
      - uses: actions/checkout@v4
      - uses: actions/setup-java@v4
        with:
          distribution: 'temurin'
          java-version: '21'

      - name: Gradle jib # github repository Settings-Actions secrets and variables-Repository secrets 등록
        run: ./gradlew jib -P username=${{ secrets.REGISTRY_USERNAME }} -P password=${{ secrets.REGISTRY_PASSWORD }} -P image=${{ env.REGISTRY_IMAGE }} -P tag=${{ env.REGISTRY_TAG }}

      - name: Setup Kustomize # shell script에서 사용할 kustomize 툴 설정
        uses: imranismail/setup-kustomize@v2

      - name: Checkout Gitops Repository # gitops 레포지토리 체크아웃
        uses: actions/checkout@v4
        with:
          repository: ${{ github.repository_owner }}/gitops
          ref: main
          token: ${{ secrets.GH_TOKEN }}
          path: gitops

      - name: Execute Shell Script # 셸 스크립트에 세 개 인자 전달하여 실행(kustomize로 이미지 태그 변경)
        run: |
          ./gitops/.github-actions/deploy.sh ${{ env.SERVICE_NAME }} ${{ env.PHASE }} ${{ env.REGISTRY_IMAGE }}:${{ env.REGISTRY_TAG }}

      - name: Git Commit & Push # 태그 수정 반영하여 커밋 푸시
        run: |
          cd gitops
          git config user.name "GITHUB_ACTION"
          git config user.email "github-action@github.com"
          git commit -am "updated by GITHUB_ACTION(${{ env.SERVICE_NAME }}:${{ env.REGISTRY_TAG }})"
          git push -u origin main
gitops
프로젝트 구조
.
├── .github-actions
│   └── deploy.sh
└── service
    ├── demo-spring-cicd
    │   ├── base
    │   │   ├── kustomization.yaml
    │   │   ├── rollout.yaml
    │   │   └── service.yaml
    │   └── overlays
    │       └── dev
    │           ├── ingress.yaml
    │           └── kustomization.yaml
deploy.sh
상단 github actions workflow 내 셸 스크립트 실행 스텝에서 사용하는 스크립트입니다. 인자를 통해 해당 디렉토리로 이동하여 이미지 태그를 변경합니다.
#!/usr/bin/env bash

set -e

SERVICE_NAME="$1"
PHASE="$2"
IMAGE_URL="$3"

if [[ -z "$SERVICE_NAME" || -z "$PHASE" || -z "$IMAGE_URL" ]]; then
  echo "Usage: $0 <service-name> <phase> <image-url>"
  exit 1
fi

CURRENT_PATH="$(cd "$(dirname "$0")" && pwd)"

cd "$CURRENT_PATH/../service/$SERVICE_NAME/overlays/$PHASE" || exit 1

echo "Deploy PHASE: $PHASE"
echo "Working directory: $(pwd)"
echo "Setting image to: $IMAGE_URL"

kustomize edit set image "$IMAGE_URL"
base/kustomization.yaml
kustomize를 통해 상위에서 재사용 가능한 공통 리소스를 정의합니다.
apiVersion: kustomize.config.k8s.io/v1beta1
kind: Kustomization
resources:
  - rollout.yaml
  - service.yaml
base/rollout.yaml
Argo Rollouts를 이용한 블루-그린 배포 전략을 정의한 manifest입니다. readiness/liveness probe, 리소스 제한, 배포 전략 등을 포함합니다.
apiVersion: argoproj.io/v1alpha1
kind: Rollout
metadata:
  name: demo-spring-cicd
spec:
  replicas: 1
  revisionHistoryLimit: 3
  rollbackWindow:
    revisions: 3
  progressDeadlineSeconds: 300
  selector:
    matchLabels:
      app: demo-spring-cicd
  template:
    metadata:
      labels:
        app: demo-spring-cicd
    spec:
      imagePullSecrets:
        - name: ghcr-secret # docker-registry secret을 미리 생성해야 합니다
      containers:
        - name: demo-spring-cicd
          image: ghcr.io/code-b-dev/demo-spring-cicd:latest
          imagePullPolicy: IfNotPresent
          ports:
            - containerPort: 8080
          readinessProbe:
            httpGet:
              path: /actuator/health/readiness
              port: 8080
            initialDelaySeconds: 60
            periodSeconds: 30
            successThreshold: 1
            failureThreshold: 3
            timeoutSeconds: 2
          livenessProbe:
            httpGet:
              path: /actuator/health/liveness
              port: 8080
            initialDelaySeconds: 60
            periodSeconds: 30
            successThreshold: 1
            failureThreshold: 3
            timeoutSeconds: 2
          resources:
            requests:
              memory: 2G
              cpu: 1
            limits:
              memory: 2G
              cpu: 1
      dnsPolicy: ClusterFirst
      restartPolicy: Always
  strategy:
    blueGreen: # blue-green 배포 전략
      activeService: demo-spring-cicd
      autoPromotionEnabled: true
/base/service.yaml
ClusterIP 타입의 서비스
apiVersion: v1
kind: Service
metadata:
  name: demo-spring-cicd
  namespace: backend
  labels:
    app: demo-spring-cicd
spec:
  type: ClusterIP
  ports:
    - port: 80
      targetPort: 8080
      protocol: TCP
      name: http
  selector:
    app: demo-spring-cicd
/overlays/dev/ingress.yaml
TLS 설정을 포함한 인그레스
apiVersion: networking.k8s.io/v1
kind: Ingress
metadata:
  name: demo-spring-cicd
  namespace: backend
  annotations:
    cert-manager.io/cluster-issuer: letsencrypt
    nginx.ingress.kubernetes.io/ssl-redirect: "false"
spec:
  ingressClassName: nginx
  rules:
    - host: {host}
      http:
        paths:
          - path: /
            pathType: Prefix
            backend:
              service:
                name: demo-spring-cicd
                port:
                  name: http
  tls:
    - secretName: demo-spring-cicd-tls
      hosts:
        - cicd.xxx.xxx
/overlays/dev/kustomization.yaml
dev 환경 오버레이 설정. base를 불러오고 리소스 제한 등을 수정합니다.
apiVersion: kustomize.config.k8s.io/v1beta1
kind: Kustomization
namespace: backend

resources:
- ../../base
- ingress.yaml

images:
- name: ghcr.io/code-b-dev/demo-spring-cicd
  newTag: dev-1-1

patches:
- patch: |-
    - op: replace
      path: /spec/replicas
      value: 1
    - op: replace
      path: /spec/template/spec/containers/0/resources/requests/memory
      value: 2G
    - op: replace
      path: /spec/template/spec/containers/0/resources/requests/cpu
      value: 1
    - op: replace
      path: /spec/template/spec/containers/0/resources/limits/memory
      value: 2G
    - op: replace
      path: /spec/template/spec/containers/0/resources/limits/cpu
      value: 1
  target: # patch target
    kind: Rollout
    name: demo-spring-cicd
배포
gitops 코드 반영도 끝났으니 이제 ArgoCD에 Application을 추가하여 배포해 보겠습니다. NEW APP 버튼을 눌러서 아래와 같이 내용을 채워줍니다.

애플리케이션을 생성하면 관련된 모든 리소스를 한눈에 볼 수 있습니다.

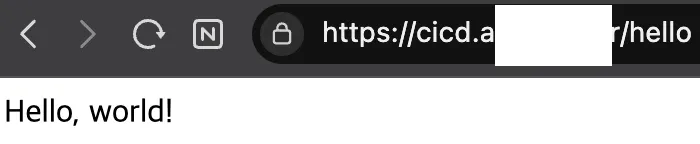
배포 후 미리 만들어둔 api path로 접속하면
이제 CI/CD 파이프라인이 잘 동작하는지 확인하기 위해 develop 브랜치에 새 커밋을 push하고 접속하면 변경된 것을 확인할 수 있습니다~